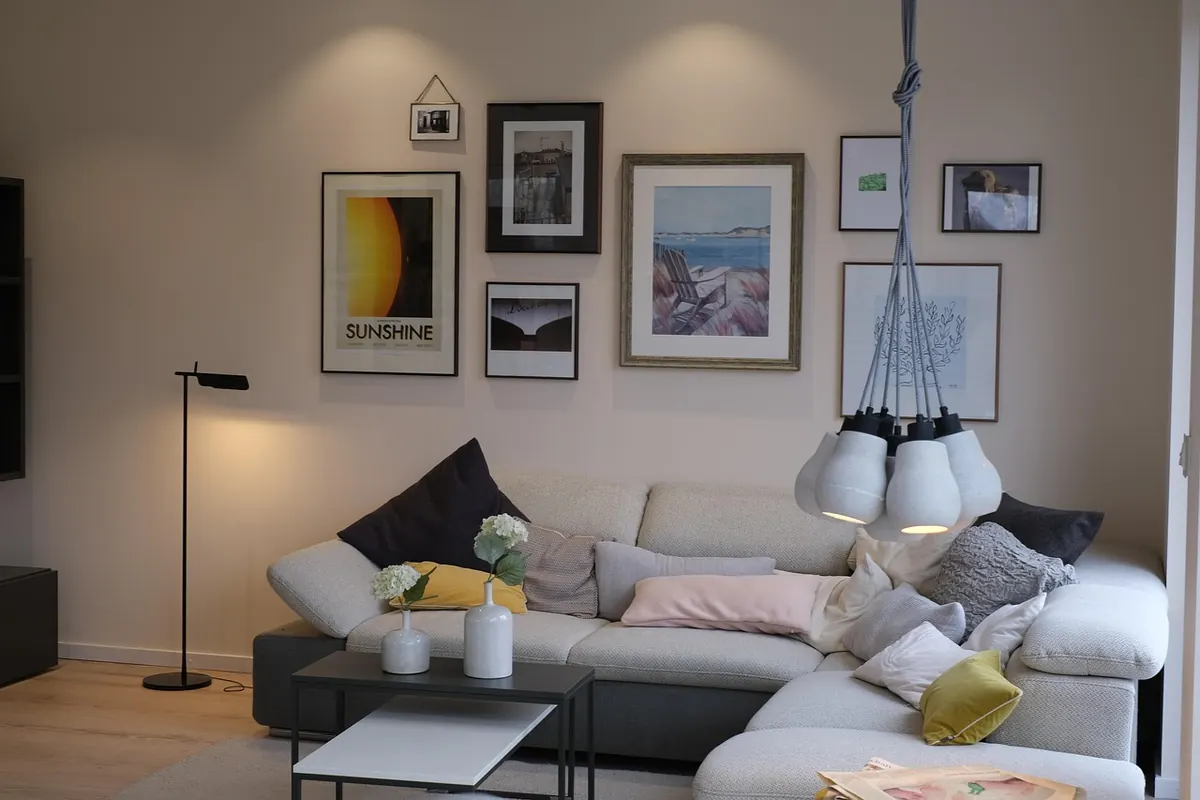
A gallery wall above a sofa is one of the few places in a home where more really can be more. A row of family photographs, a set of botanical prints, a mix of sizes filling a long blank wall — done well, it makes a living room feel collected rather than decorated. The trouble starts when the frames stop reading as a set and start reading as a jumble. That shift is rarely about how many pieces you hang. It is almost always about spacing, scale, and a little planning before the first nail goes in.
Here is a sequence that works, whether you are hanging three prints or thirteen.
Most people plan a gallery wall against the wall itself. Start with the sofa instead, because that is the shape your arrangement has to answer to.
As a general guideline, the composition should span roughly two-thirds to three-quarters of the sofa's width. An 84-inch sofa, then, wants a grouping about 56 to 63 inches wide. Wider than the sofa and the art looks like it is falling off the edges; much narrower and the wall around it starts to feel bare and disconnected.
Center the group on the sofa, not on the wall. Those two lines are often inches apart, especially if there is a floor lamp at one end, a window on one side, or a doorway that pushed the sofa off-center when you moved in. A strip of painter's tape marking the sofa's left and right edges on the wall takes thirty seconds and saves you from drilling a perfectly centered arrangement above a perfectly off-center couch.
This single decision does more for calm than any frame choice. Choose a gap of 2 to 3 inches between frames and hold it throughout the arrangement — between every pair, top to bottom, left to right.
If the wall is large and the frames are big, 3 inches reads better. If the grouping is tight and the pieces are small, drop to 2 inches. What you should avoid is variation. A 4-inch gap in one spot and a half-inch gap in another tells the eye that something went wrong, even if the viewer cannot say what.
Measure the gap from frame edge to frame edge, never from hook to hook. Hardware is rarely centered, and the difference shows up the moment the pieces are on the wall.
Think of the gaps as part of the artwork. If the spaces are even, the arrangement reads as one piece made of many.
A wall of identically sized frames is easy to hang and easy to ignore. Give the arrangement a lead: one piece noticeably larger than the rest, placed near the visual center. A common approach is to make the anchor roughly one and a half to two times the size of the next largest frame, then build the smaller pieces around it.
Beyond size, choose a thread that ties everything together and vary the rest:
Pick one thread to hold steady and let the other two wander. Try to control all three and the wall looks like a catalog page; control none and it looks like a flea market booth.
Frames are expensive and walls are unforgiving, so rehearse. This is the step that separates a balanced wall from a peppered one.
Only after the paper version looks right should you mark and drill.
Hang the lowest edge of the lowest frame 6 to 10 inches above the back of the sofa. Lower for a low-backed sofa where the wall is more visible; higher if the cushions are deep and tall and people lean back into them. The art should feel connected to the furniture beneath it, not floating above it.
As a general starting point, the center of the arrangement can sit around 57 to 60 inches from the floor, which is roughly eye level for an average adult. Above a sofa, though, the bottom-edge rule matters more than the centerline, because the sofa changes the relationship between the art and the floor. If your finished wall looks slightly too high, it probably is. Moving a gallery wall down two inches fixes more problems than almost anything else you can do.
Clutter above a sofa is usually not about quantity. It is about competition. Watch for these:
Hang the pieces, step back, and then leave the wall alone. Resist the urge to fill that one remaining gap with something from the closet. Emptiness around a gallery wall is not a problem to solve — it is what makes the arrangement look intentional instead of accumulated.
After a week, notice which piece your eye keeps avoiding. Nine times out of ten the fix is subtraction, not addition: take one frame down, patch the hole, and the whole wall relaxes. Keep a small jar of spackle and a touch-up paint sample in a drawer, since a gallery wall is rarely finished on the first try. It is a slow project, and the ones that look best usually were.
Photo: nali_wike / Pixabay